Sunday, August 17, 2014

Matching Trinket Boxes


So here are some trinket boxes I made. I ran out of room in my jewelry box, which by the way was my Mother's, and I did not want to get a bigger one. So I made three matching boxes to sit on top of my jewelry box. One holds holiday pins, one holds Christmas pins and the third holds necklaces. To fit many necklaces in there without them becoming tangled I simply took an index card, folded it half almost equally. I then hole punched two holes and cut a slit into the bottom of each hole punch. It essential looks like the card you buy jewelry on. I hang a small portion over the front and let the excess chain fall into the fold. It is working pretty well so I am going to redo them with pretty card stock.

So to start off, I used what I had and altered it. What I had on hand was empty jewelry boxes. I chose three that were the same size for this project. Now they are rather short to begin with so I made them taller. Beginning with the box bottom, I first went around all of the edges with a permanent black marker to cover any scuffs that would show when finished. Then I glued on a strip of scrap booking paper [the butterfly paper] - centered. I used the same strip on all three to make it a set but the portion I enlarged the box with were coordinating papers so they have a little more interest. 


To finish off the bottom section, I glued on two thin brown paper strips. The before is on the left and the after is on the right. The next step is to enlarge the sides. Now since the box already has a lid, you can make the sides as tall as you would like. For myself, I just needed it tall enough to hold necklace cards. Simply the length of your required paper will depend on your box. You just need to measure it twice so you only have to fold it once. I cut my paper twice the height I needed so I could fold it over allowing the inside of the box to be finished as well. I inserted a thick cardstock [solid white] in the middle of my design paper [pink striped] to make it more sturdy. I recommend prefolding your paper before you glue inside designed paper side A to white cardstock to inside designed paper side B.

Once they are dry, glue them into the side of the bottom portion of the box. 


While these sections dried, I worked on the lids. I once again took the black marker around what would be the exposed edges covering any scuff marks. Since my boxes were square, I cut a square of paper for the top. I chose to use the same paper on all three to once again unify the set. I embellished the edges with gems. My boxes were black. I did not want black. I cut a strip of the same brown paper I used to edge the bottom the same width as the lip on my box top. I glued the strip around the outer lip.


I decided to add a handle on top. What I used were bottle caps. I saw on another crafter's site where they filled the bottle cap with pearls and gems and such. It looked so pretty. If you want to do the bottle cap, first put a puddle of glue covering the bottom. Place pearls, crystals or gems around in the cap. Fill in the empty space with seed beads. In fact over fill with seed beads then press firmly to pack them in. After a few minutes you can turn it over to allow the extra beads to fall off. Place it aside to dry.


So at this point all that is left is to embellish the outside of your box as much or as little as you would like. Since I would be handling them frequently, I decided not to add to much dimensional items to the sides, but if you will not be handling it very often then flower cluster, bows or charms would be so pretty. To finish off the inside, I cut a square of the same brown paper I used as strips on the outside bottom and glued it inside on the bottom. I also took the cotton from the box and peeled into layers. It already comes cut to size in the box. I glued that to the inside of the lid and covered it with a square of designed paper. This is so there is a soft contact spot with any jewelry that may stick up kinda high. If you will be using this box for some other purpose, you certainly may not need to do this step. You may leave the box lid in it's original finish [usually white], you could paint it or cover it with design paper. If this is a gift, that is a perfect spot for a sentiment. 


At this point all that is left is to add feet if you like. I used those glass planter stones you can get almost anywhere. Don't forget to glue your handle onto the top. Let it dry overnight before you handle it to allow time for the glue to set and really hold your feet and handle in place. 


Sunday, August 3, 2014

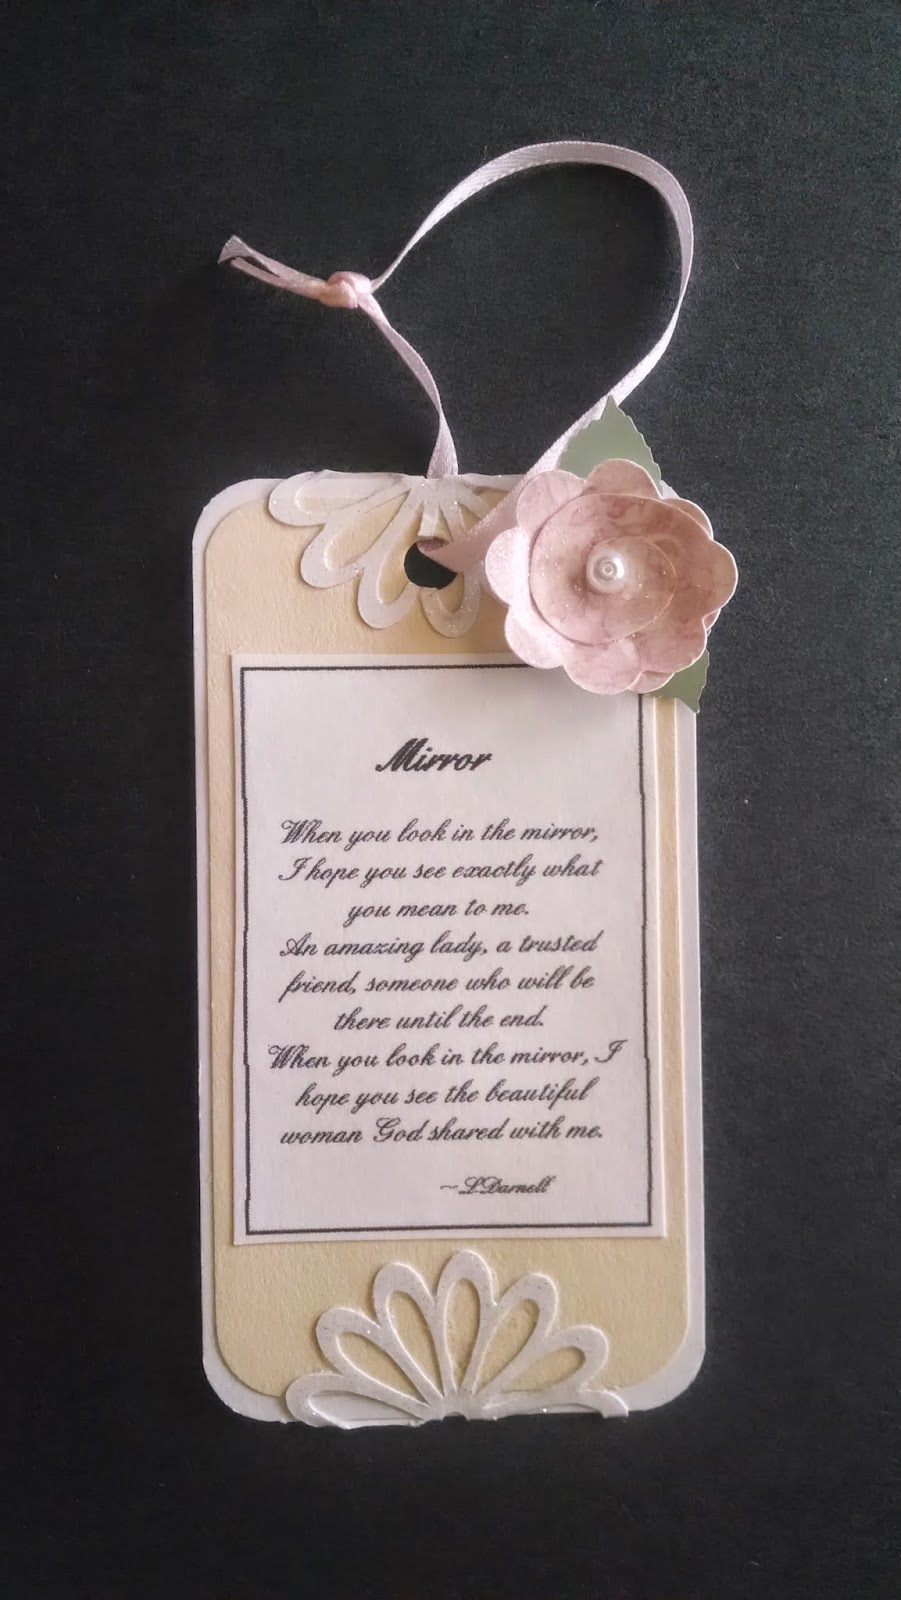
Two Pocket Card with keepsake tag


Here is a pocket card I made. It is a simple card with a lot of possibilities. This card is for my daughter in her favorite color combo right now.  It is a simple side fold. Some dimensional elements added. I made these flowers for another project but did not use all of them and since she loved them I saved them for her birthday card. 


The inside has two pockets. I first matted the inside with a light yellow. My pockets are slightly less than half of the page. Being I was placing thin items into them I merely glued the sides and bottom flat. If you were going to include something a little thicker, you would want to fold the edges under to have a pocket that is raised. Now don't forget if you make a thick pocket, to make a double crease on the card to accommodate the thick pocket allowing the card to lay closed. 


Here is a closer look at the left side pocket. In this pocket, I placed a long tag with two smaller tags attached towards the top. Each of the smaller tags had personal messages wrote on the reverse side.


The right side pocket contained a large keepsake tag. The front of the tag is decorated without sentiment. The reverse side has a personal greeting on it. Overall this was an easy card to make. Once you decide upon your inspiration and what the pockets will contain the rest just falls into place. The white scroll work are die cuts via the Circuit Expressions. TO define the white paper and give it some umph, I gave several coat with Tulip Glitter Dimensional Fabric Paint in Diamond. The key to using this on paper to add glitter effect is to do several very thin layers. This paint dries clear adding a satin shine and of course it has iridescent sparkles.
What I learned making this card - planning out the design. If you don't where you are going with your design it will reflect that. I like the Tulip Diamond when dried. It is not an overbearing glitter or a child or Christmas glitter. I used the pockets for keepsake and personal wishes. The could contain money or gift cards, tickets or even a heavy card stock cut to fit with two slits from which you hang a necklace. 


Friday, June 27, 2014

My hand at a Pocket tri-fold card

So I tried my hand at this pocket tri-fold card. I saw a picture of a finished one and had to kinda reconstruct it in my head but the mechanics were not hard. It did require some measuring and pre-planning. Usually I plan my layouts and fuss around with them before I glue anything down so it worked out fine. Ok so the card has a front panel and back panel joined by a fold in the middle. The inside front and back panel are pockets. The front panel will hold a gift card or good old cash. The back panel pocket holds a tag. Since this card was for one of my daughters, I chose for the card to contain a poem on being a daughter. So the tag can either stay in the card or is also designed to be a stand alone bonus gift that can be hung off a lamp or something.

Front of the card. Just a regular rectangle designed with layered mats, cut outs and punches. The flowers were made from scalloped cut circles that I cut into to make petals and then slightly curled each petal under to give them a little dimension.

Inside showing front panel with pocket and left side of middle fold. The middle section is one long piece. It is the left pocket, middle fold section and the right pocket. If you do not have a piece of paper long enough to spread across then I would join two sections smack in the middle of the hinge.

Inside showing back panel with tag pocket and right side of middle fold where sentiments were placed. The pockets are not sized the entire panel, smaller is more here. Also the middle fold section is about 60% across the panel. It is to be an additional embellishment but not main feature so don't make it to big.

This is the front and back of the tag in the back pocket.


The papers used are some I had designed and some from Cajoline Scraps that I recolored so everything matched. The cut outs were done with The Cricuit Expression on card stock. I used Tulip Glitter Diamonds on some of them to make it sparkle. A few beads and gems finish it off. I like to use nail gems on my cards because they are pretty flat and not so bulky plus they come in tiny sizes.

It took me several days from start to finish but I am happy with it. The most important tip I can give you if you try this card is to play around with layout before you glue anything down. Symmetry was key for me in my design but maybe you have a different idea. This is my first attempt at this card style and I like it. Obviously this one is very girly but any color combo and embellishments can change the feel of any card design. I will use this style of card again.

Saturday, July 6, 2013

Been Away

I have been away for awhile taking care of someone but I am back home now and starting to get back into the flow of things. I created two cards recently, one is for a birthday and one is for my grand daughter who has started potty training. Kinda cheated. I did not have a stamp of a little girl so I did the next best thing, I drew my own. I know some of you like to use stamped or printed lettering but I like to write mine. If I am giving a handmade card, to me the most personal part of it is the greeting and well wishes and I want them to be hand written.


It was a lot of fun crafting again.  I also made a plaque. I used air drying clay to see how it worked out. I find that when it dries it is a bit brittle so choose carefully what you will incorporate it into. It also starts to dry quickly so you need to work quickly or in segments and glue them together later. I am going to make some little do-dads type things with it to put on cards and altered boxes. I will let you know how well it works out.


I didn't think this through because the side with the fairy ended up much heavier and the plaque would hang crooked. So what does a crafter do? Improvise! I raided my husbands tackle box and put a line weight under the clustering on the bottom right corner. LOL, it worked!

Lastly, I started painting t-shirts for the grand-babies birthdays later this month. They will be 2 and 3 and really like Sesame Street right now so I painted Cookie Monster and will start Elmo today.


I did not add any wording. Not sure if I want any on it or not. My husband said I should put "Me want cookie." I use crafting paint that reads permanent when dry. I also add some dimension with fabric dimension paint. After it is completely dry I toss it in the dryer on low for awhile to make sure everything sets. I used to paint t-shirts and sweatshirts for my kids when they were little and they loved them. It is nice having grandkids to paint again for.

Okay so here is Elmo.

Sunday, February 24, 2013

DIGISTATION FEBRUARY POT LUCK KIT

Hey guys. It has been awhile since I have been online. Had something going on but I am back.  I entered a challenge over at DIGISCRAPSTATION. It is a color challenge they fondly call "Pot Luck Kit." Below is a preview of my part. If you would like to see what others have created then click on over, I linked their name above.


My part contains 5 papers, frame cluster, cluster, mat, and 8 elements.